


What Are Charger Plates?

Updated: Aug 11
I happen to be relatively new to creating tablescapes that incorporate more than just a small centerpiece and a few votives. As an empty nester, I now have the time and I've been having so much fun experimenting! I've come to understand my personal style/approach which took me some time to cultivate, and I feel this is just the beginning for me. I believe this will be an ongoing process for me; the more I do, the more I'll learn about my own style preferences. One area that I am not that confident about is mixing colors and patterns together, so I definitely err on the subtle side. I tend to stick with neutrals as my base and then introduce pops of color and (related) patterns. I encourage you to explore what this means for you as it enables you to create your tablescapes with confidence. I don't believe it's something you can teach as it is so subjective in nature. What works for you may not work for your bestie. One of my favorite ways to incorporate small bits of color is with charger plates.
If you're new to tablescaping as I am, you might be wondering: "What are charger plates and why do we use them?" Believe it or not their history goes back a few centuries to medieval England. They began as massive serving platters for roasted meats for communal feasts. Over time, their function evolved into being used to delineate individual place settings for the 17th and 18th century aristocracy. They were also used to protect the tablecloth from spills and to help hold the heat of the dinner plate. Today, they are used purely for decoration.
Modern day etiquette dictates that the charger plate remain in place for all of the savory courses of the meal. It gets removed just before the dessert course is served. Wanting to know why this is the case, I did a little internet search and the only explanation I found was it provided the dessert course a fresh setting. This didn't make sense to me at first until I thought about it a little further. If one of the dinner guests had, in fact, spilled either soup or gravy from the savory course onto the charger, it would be most unappetizing to have the charger remain in place whilst trying to enjoy the dessert course.
Charger plates generally measure between 11 to 14 inches in diameter and they are available in a variety of materials. Today you can find chargers made from porcelain, wood, glass, acrylic, plastic and metal. Many of these materials are not suitable or safe for serving food on so a dinner plate rests on top of the charger.
If you enjoy a simple DIY craft project, you'll love customizing your own chargers. It's a simple way to create something special for celebratory reasons without breaking the bank. To illustrate my point, I decided to experiment with doing just that with left over fabric I had from a previous project. After watching a few YouTube videos, I felt ready to create my own. The fabric I used is rather feminine, so I envisioned these chargers being used for a bridal shower or ladies luncheon. This was my first attempt at making my own chargers, so I chose inexpensive 13” plastic chargers which I ordered from Amazon. Additional materials needed are scissors, paint brushes, and Mod Podge.
As you’ll see from the pictures below, it’s really quite simple to customize your own chargers. The biggest thing required here is patience. You need to allow each coat of Mod Podge to dry completely before adding another coat.
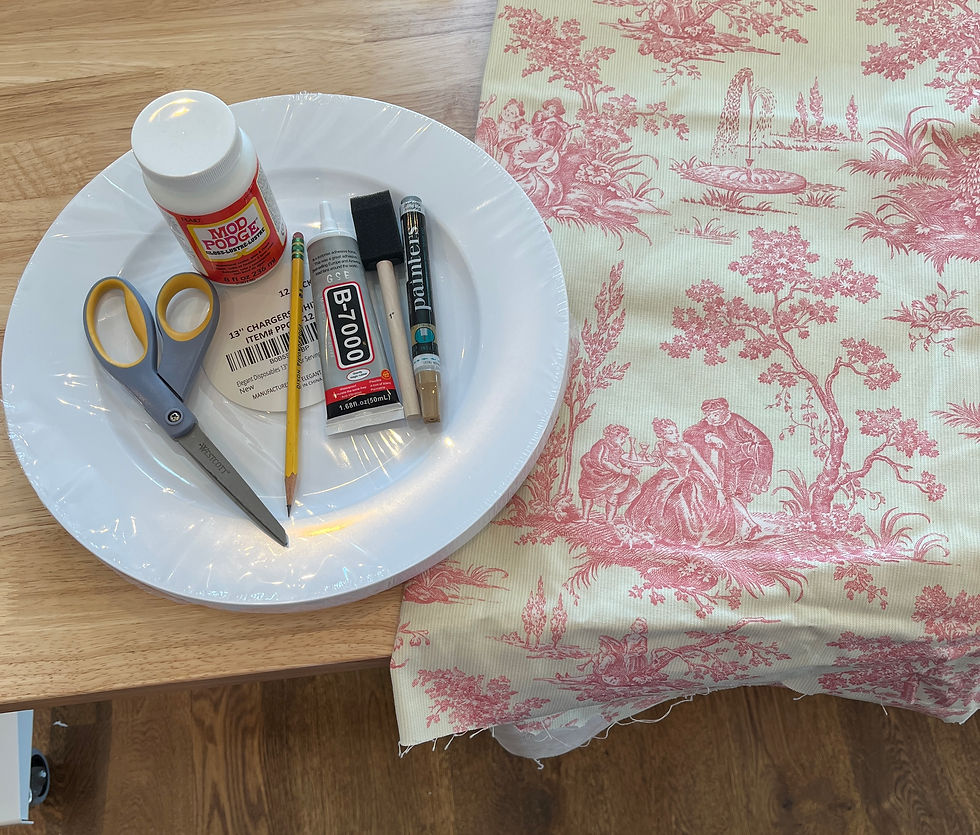 |  |
 |  |
Side notes: Had I been making these for a real bridal shower, I would have chosen glass or acrylic charger plates to customize, as they would make a lovely keepsake gift for the bride-to-be. She could use them for future entertaining events of her own. Also worth noting; don't throw out the scraps of fabric as they can be used to make matching napkin rings.
I hope this post inspires you to experiment with using and/or making charger plates for your next tablescape! If you'd like the step-by-step instructions for making your own chargers, you'll need to become a CABB insider: It's free! Simply go to my website, click Freebie Library to join. The step-by-step instructions are in the Blissful Resources. https://www.craftingablissfulbungalow.com/


Comments